

Rust New Player’s Guide: How to Begin Perfectly and Thrive

- Choosing the Right Server for Your Game
- Choosing the Right Server
- Server Wipe Date Awareness
- Surviving in a Cold Biome
- Choosing the Right Location for Your Base
- Getting Started in Rust
- Gathering Resources in the Game
- Starting Your Survival Journey
- Tips for Setting Spawn Point in Rust
- Building Plan and Animal Hunting
- Tips for Building a Strong Base in the Game
- Optimizing Base Building Strategy
- Tips for Base Building in the Game
- Breaking Barrels and Looting Crates
- Monuments in Rust: A Guide to Loot and Player Activity
- Low-tier Monuments Overview
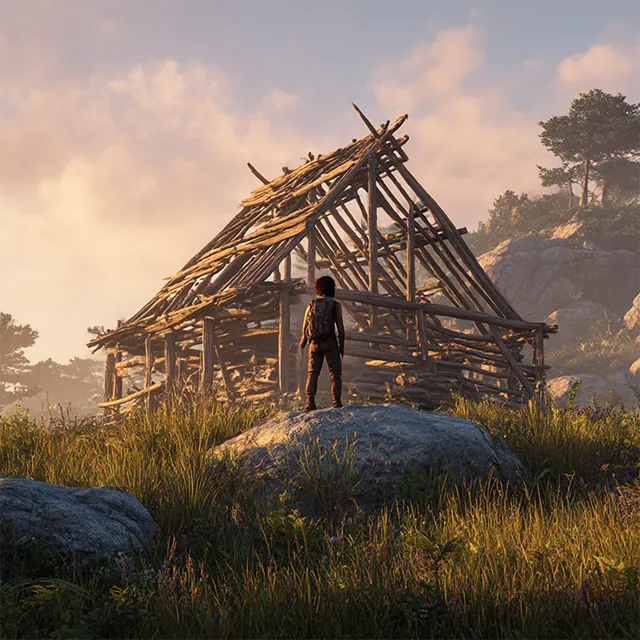
Hey there, survivors! Librarian Husky here to help you conquer the tough world of Rust. Whether you’re just starting out or finding the game challenging, this guide covers all the essentials—from gathering loot and crafting to building and fighting—so you can get a solid footing and thrive. Let’s dive in and turn those early struggles into your first big wins!
Choosing the Right Server for Your Game
Choosing the right server can make a huge difference in your Rust experience. To avoid high ping, toxic clans, or rampant cheating, it’s essential to pick a server in your region. Start by clicking “Play Game,” then scroll down and select the region closest to you for optimal ping and smooth gameplay.
Importance of Server Selection
When browsing servers, prioritize vanilla servers with weekly or bi-weekly wipes. These wipes reset the world, ensuring fresh competition and fair progression.

Choosing the Right Server
For beginners, modded solo, duo, or trio servers like Stevio Rust or Blue Lagoon are excellent choices. These servers offer boosted gather rates, faster smelting and crafting speeds, and unlock level one workbench blueprints, making early game easier and less frustrating.
For Beginners
If you’re more experienced and ready for a challenge, official servers provide the true Rust experience but expect to face tough competition and frequent deaths.
For Experienced Players
Don’t forget that servers wipe regularly, removing all progress — including buildings, weapons, and loot — so staying aware of your server’s wipe date is critical.
Server Wipe Date Awareness
Keep track of when your server wipes to maximize your playtime and plan your base building and raiding activities accordingly.
Selecting a Survival Spot
Once you’ve chosen your server and spawned on the beach, open your map to find a suitable survival spot. Remember, Rust maps are randomly generated for each server, so no two maps are identical.
Biomes and Tiers
The map features three biomes: summer, desert, and winter. Each biome can be divided into tiers, with tier three usually being the winter biome. Winter areas have more sulfur nodes, making them hotspots for clans and intense competition.
Surviving in a Cold Biome
In cold biomes, wearing warm clothes is essential due to the persistent cold, especially at night. The vast open spaces make it challenging to hide during PvP encounters if you don’t have barricades or cover. Additionally, most players here tend to be fully geared, so I recommend you skip this biome if you’re a beginner.
Challenges of a Hot Biome
Tier two areas usually consist of desert biomes or parts of summer biomes depending on map generation. Unlike winter, these biomes will have you feeling hot and losing water more rapidly. Resources such as trees and nodes are scarcer, making survival tougher. Due to these factors, player density is often lower unless there’s a nearby monument.
Choosing the Right Location for Your Base
For beginners, tier one biomes near the beach with low-tier monuments are ideal. These include places like gas stations, warehouses, fishing villages, and junkyards — all free from radiation. This zone is typically populated by naked and primitive players, making it perfect for newcomers. Here, you will find an abundance of resources, animals, food, barrels, crates, and much more, providing a solid foundation for your start.
Consider Monument Contention
Try to build your base in a location that gives you access to multiple monuments, so you can switch between them depending on how contested they are. This flexibility can greatly improve your survival chances and resource gathering efficiency.
Getting Started in Rust
For example, this place, or this place, or maybe this place would be perfect for your survival journey.
Starting Resources
With all the information above, I hope your brain hasn’t exploded from it all. Let’s get into the game. You always start with a rock and a torch. The rock is your primary tool for gathering resources, while the torch provides light when darkness falls. Take a moment to look around.
Gathering Resources in the Game
If you spot any bodies lying nearby, harvest them to collect bone fragments. Gather 30 bone fragments to craft a bone knife. If no bodies are around, you’ll need to farm 300 wood to make a spear. When farming, aim for the red X on trees or ore nodes — this spot yields more resources per hit. Similarly, target the shiny parts of ore to speed up gathering.
Advantages of Using a Bone Knife Over a Spear
A bone knife is preferable to a spear because it allows you to run and hit enemies simultaneously. A spear, on the other hand, is slower to use and restricts your movement, though it can be thrown.
Starting Your Survival Journey
Once armed, your main goal is to reach your base location quickly while avoiding fights. Collect essential resources like wood, stone, and cloth. Ideally, gather 100 cloth, 2000 wood, and 500 stone. These materials let you craft a sleeping bag, bow, arrows, bandages, stone axe, and stone pickaxe — the minimum gear for a comfortable start.
Resource Management and Crafting
If you find valuable loot during your travels, craft a small stash to hide it. If your loot haul is significant, it’s safer to build a wooden shelter to store your items securely, then return for it later.
Tips for Setting Spawn Point in Rust
Don’t forget to throw a sleeping bag near your shelter to secure your spawn point. When placing multiple bags, ensure they are blue and not orange to avoid overlapping the 5-minute bag timers.
Strategies for Efficient Travel in Rust
If you plan to run to your build spot carrying loot, be prepared for others trying to steal it, especially on high-population servers. To get there faster, you might get lucky and find a horse or a bicycle, which is like hitting the jackpot. Alternatively, you can use the railway system and take the train to your location, but this requires low-grade fuel. To craft fuel, hunt animals and craft it from their fat and cloth.
Building Plan and Animal Hunting
Hunting animals is not as simple as it sounds. First, you need to craft the building plan. Once you hit an animal, quickly place the building plan and build a foundation to protect yourself from its attacks. After that, chase and shoot the animal until it is downed. Another way to get fuel is to find roads and farm red fuel barrels.
Crafting the Building Plan
Crafting a building plan is essential for survival. It allows you to quickly secure a foundation to protect yourself from aggressive animals while hunting. When encountering animals, placing a foundation shields you from damage and increases your chances of a successful hunt.
Collecting Fuel from Red Barrels
Another method to acquire fuel is by farming red fuel barrels found along roads. These barrels hold valuable resources needed for crafting fuel. Exploring these areas and harvesting fuel barrels is an effective way to keep your operations going.
Tips for Building a Strong Base in the Game
Always be careful and keep an eye around you to avoid being sneaked up on from behind or the side. Even if you get killed along the way, don’t feel discouraged. Use the sleeping bag you placed earlier and start your journey again from there.
Optimizing Your Base Building Strategy
If you managed to reach your chosen spot with all your loot, it’s important not to waste time. You should have crafted a building plan, a hammer, a Tool Cupboard (TC), a double wooden door, and two locks during your run. Now find an open area with no nearby bases — the worst scenario is having an online neighbor camping under your door 24/7.
Starting with a Solid Foundation
Begin your base with a simple one-by-one structure and expand gradually. This minimizes the risk of building mistakes or resource waste while farming for a larger base.
Optimizing Base Building Strategy
Place your Tool Cupboard (TC) close to the walls in a corner to allow room for a shelf next to it. When expanding, create an exit near the TC side to make it harder for intruders to break in. Don’t forget to place a campfire next to your main entrance — it adds a useful tactical advantage.
Effective Placement Techniques
Strategic placement is key to both resource efficiency and base security. Snugly positioning the TC in a corner against the walls helps protect your base and provides space for shelves. Aligning your exit with the TC increases defensive capabilities, while a campfire near the entrance serves as an additional survival tool.

Tips for Base Building in the Game
If you notice your comfort rising above the default 50%, it means an enemy is camping right outside your base within the comfort radius. To optimize your space, place boxes, furnaces, sleeping bags, and other items as close together as possible to avoid wasting valuable room inside your base.
Breaking Barrels and Looting Crates
Breaking barrels and looting crates is essential for gathering resources. You will find regular crates containing components and other useful items, as well as small red crates that may contain weapons, clothes, or tools.
Monuments and Loot Opportunities
Monuments are key locations offering various loot opportunities. They are divided into several categories:
Monuments in Rust: A Guide to Loot and Player Activity
Monuments in Rust are special locations scattered across the map that offer valuable loot and unique gameplay opportunities. They vary in difficulty and player activity, ranging from safe zones where combat is disabled to high-risk areas guarded by powerful NPCs and well-equipped players. Understanding the different types of monuments and their typical loot can greatly enhance your survival chances and help you plan your raids and resource gathering efficiently. Whether you are a beginner looking for safer spots or an experienced player hunting for high-tier gear, knowing how to navigate monuments is essential in Rust.
Safe Zones
These include Outpost, Ranch, Fishing Village, and Bandit Camp. You cannot be killed here, and each offers useful items or vles that can be traded for scrap, the main currency in Rust.
High-tier Monuments
These are more dangerous locations like Launch Site, Military Tunnels, Missile Silo, Oil Rigs, and Underwater Labs. These contain the highest tier loot and elite crates but are heavily guarded by well-equipped players and NPCs. It is recommended to avoid these as a beginner.
Mid-tier Monuments and their Loot
Mid-tier monuments like Train Yard, Power Plant, Airfield, Water Treatment Plant, Dome, and Satellite Dish offer decent loot and are frequented by players with a range of equipment, from primitive to advanced.
Low-tier Monuments Overview
Low-tier monuments include places like supermarkets, gas stations, harbors, lighthouses, junkyards, and mining outposts. These areas are safer to farm components in, as there are fewer heavily equipped players and less risk of campers with powerful weapons due to radiation zones.
Progression Strategy
Start by placing a workbench and researching necessary items. Simultaneously, expand and upgrade your base to metal and high walls. Craft additional workbenches, improve your weapons and armor, and when ready, engage in base raids. This progression path offers many opportunities for advancement and success.
Thank you for diving into our guide! Discover our exceptional Rust boosting services and elevate your gaming experience with our top-tier boosts.