

Marvel Rivals Groot Mastery Guide – Best Builds, Combos & Team Strategies

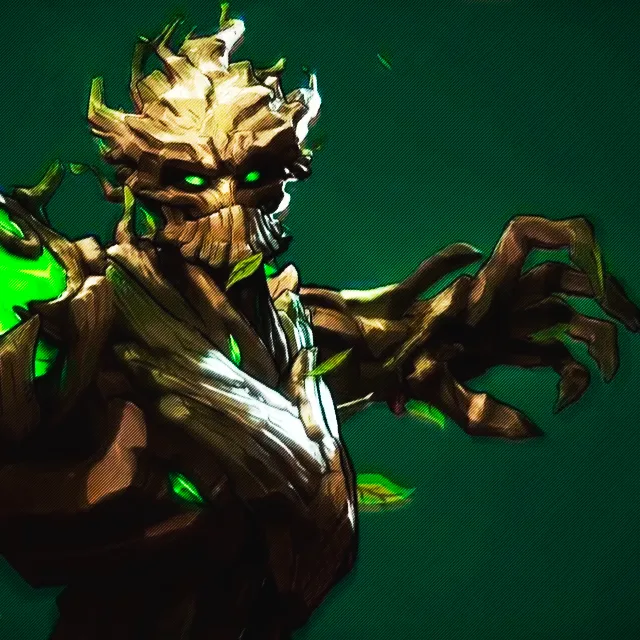
My name is Librarian Husky.Groot has been a menace amongst the cast of vanguards in Marvel Rivals, making him an incredible pick in ranked across many seasons.
Groot’s Gameplay Guide
Starting things off, understand that Groot is a tank that prefers to be in the front line to get most of his value as opposed to other tanks like Magneto that can be very flexible in how they want to play. Groot is all about sectioning off enemies from each other with his walls so that specific targets cannot get healing, allowing you to take them down with the rest of his team. If you can’t place his walls right, you are going to struggle to get a lot of value with the character and you’re going to lose games.
While Groot can do a lot of damage outside of walling, it means nothing if all of that damage is just going to get healed up anyways. So, you want to start fights by using cover to get in position in the front line without wasting your walls. And then what you’re going to want to do is you’re going to want to wall tanks off from their healers, farm your alts, hit crazy combos alongside the rest of your team, and then you are going to be carrying games on Groot. With this in mind, let’s start discussing his kit.
Groot’s Primary Fire: Vine Strike
Starting with his primary fire, the vine strike. He fires earthy projectiles that deal 65 damage per shot. The vines are projectiles and not hit scan. So from further away, you’re going to have to slightly lead your shots. But the thing is is that the shots are so big that you don’t really have to think about it all that much. Just know that you’re not shooting a hit scan bolt. The shots cannot headshot either, so aiming for the head isn’t necessary. Instead, try to aim for the legs since that part of the hitbox is usually larger.
Furthermore, the vines can only hit from 20 m away before they run out of range. This might sound kind of bad, but understand that you’re still outranging an Emma Frost beam by 2 m with this knowledge, so it isn’t really that bad. Honestly, the primary fire of Groot is really simple in and of itself, and it’s when you use it in conjunction with the rest of his kit that makes it complex and interesting. An easy example of this is with his melee passive, Furious Flora, that gives him a three melee combo, a lot like Invisible Woman.
The first two melee strikes hit from 3 meters away, while the third final strike hits from up to 4 meters away and knocks enemies back and up. The nice part about these melees is that you can actually weave these in between shots to amplify your damage and utility. This takes your combo that takes out squishies from four shots to three with the melees intertwined with the rest of your shots. And that isn’t even taking into account the damage your walls and spore bombs can do, too. So, make sure you’re getting the most out of your damage by weaving in as many melees as possible.
Before we talk about Groot’s walls, let’s talk about his final primary damage ability, the spore bomb. The spore bomb is a thrown grenadelike projectile that explodes dealing 55 damage to all targets in a 5 meter radius with six explosive clusters spawning after the initial impact that deal 10 damage each with a much smaller impact radius. In total, with all of these explosions hitting, the bomb does 105 damage and can be thrown every 6 seconds. All of those spores are rarely going to be hitting anyone on the enemy team, though.
Groot’s Spore Bomb and Thorn Lash Walls
So, the bomb is best used when targets are grouped up or at a tank’s feet to deal more damage, and it can also be weaved in between primary shots. While the spore bomb is great for dealing damage in general and charging your ultimate, it is also an excellent tool to pressure squishies so that they can’t just walk past you and into your backline. For example, while bombing at the tanks can give you some old charge, finding a bomb on the supports in the backline is great as well because it will halt them from healing the rest of their team safely and give them a lot more to think about when they’re getting pressured.
All right, but let’s dive into the meat and potatoes of Groot‘s kit with his first wall option, the thorn lash walls. Pressing shift by default, Groot will get a prompt to place a wall down that will be confirmed with left click. He gets one of these walls every 6 seconds and can hold on to a total of two at a time in his inventory. Every time you press shift, you can change the angle of which you place the wall with one of three modes.

The first mode is your basic vertical wall. This is great for cutting off enemies from each other. You can also place two of these walls together by holding and dragging. It’s pretty sweet. The second mode is a diagonal wall, perfect for creating a staircase to inaccessible high grounds for you and other players. You can stack three together with the fourth one breaking the bridge that you are making altogether. The final mode is a horizontal wall, great for setting up things like traps against your enemies on top of choke points. This is great to have pre-placed before fights start. Each wall segment has 250 health each. So definitely breakable, but when you were cutting people off in the middle of the fight, unless the enemies have Punisher, Loki, Iron Man, or anyone else that can deal some good damage, you’re not really going to have to think too much about whether or not this wall is going to break.
The nice part about these walls is that they do 60 damage per second to any enemy that is nearby them. So long as Groot is within a 20 m radius of the wall itself and they take damage from any source on Groot’s team. Doesn‘t have to just be Groot. It can also be the Jeff the Shark that’s just healing you the whole time.
But now that we have a basic understanding of how these walls work, when should we really be using them? Because Groot gets these walls pretty consistently with a faster cool down. These are the walls you are using to set up picks early on in the fight pretty consistently. While his iron wall that we will discuss soon is still pretty great for finding picks, you are committing much more by using this ability since it is on a much longer cooldown. A lot of Groot though comes down to learning when you can and cannot use the balls to find value and when it’s better to just kind of chill around the corner and wait for the enemies to walk in.
Groot isn’t like Magneto that has a lot of tools to utilize in the downtime commonly at the start of fights. So, it is really important that you’re being patient and you’re trying to pressure the targets on the enemy team that have movement abilities so you can waste those out and then find picks later in the fight with your walls. Common examples of this are like if Strange has his leap instead of just investing all of your walls to take him out as soon as you possibly can.
Optimizing Ironwood Wall Placement
Instead of leaving the Ironwood wall idle, strategize its placement to pressure opponents effectively. By creating walls strategically, you can limit their escape routes and secure picks. Groot‘s Ironwood wall, larger and sturdier than other walls, plays a crucial role in engagements. Leveraging its benefits requires proactive planning, not just passive deployment.
When using the Ironwood wall, aim to create openings for your team by forcing enemy cooldowns or securing crucial eliminations. Placing walls strategically in tight chokes can control enemy movements and create opportunities for your team to capitalize on. Remember, removing unnecessary walls is essential to prevent obstructing teammates and to optimize cooldown management.
Retrieve your walls promptly when they have served their purpose to reset cooldowns and prepare for the next engagement. Prioritize resetting the Ironwood wall first due to its faster cooldown refresh rate based on damage taken. Understanding Groot’s reliance on abilities emphasizes the importance of efficient wall management to maximize impact during team engagements.
Groot’s Wall Charging Mechanism
So, speaking of Emma, she generates charge off of your walls. So, if you leave one just hanging outside of your range so that you can’t take it down, she will very commonly just sit there and tap your walls to build or retain charge and absolutely roll your team thereafter. If the enemy Emma gets to keep 100 charge and your Emma does not, it does not matter how much better your Emma is compared to theirs. Even a top 500 Emma player will lose to a grandmaster. It is just how the character works.
Finally, against dive, Groot tends to struggle, but it isn’t impossible. You just have to change your approach to how you’re going to be wanting to use your walls. Instead of thinking about your walls in this scenario as finding a pick in the front line, you can place it in the front line’s face to buy your team time to deal with the diver in the backline like Black Panther or Psylock. You can be flexible with Groot in how you place your walls. But so long as you aren’t just tossing them around and wasting them, you are doing better than 90% of players, and that’s not even a stretch.
Groot’s Ultimate – Strangling Prison
Enough talking about his normal abilities, though. Let’s discuss his ultimate. I am Groot. But what it’s actually called is strangling prison. I mean, that was that was pretty good. Not as fun, though, if you ask me. Upon using the ultimate, Groot will lob a projectile much like his spore bomb that pulls enemies to the center within 8 m of it and for 3 and 1/2 seconds before it goes away. The impact deals 70 damage to all enemies pulled to the center and then another 140 damage over the ultimate’s duration. But this isn’t really what makes the ultimate good. What makes the ultimate good is the combo potential it has with other strong ultimates in the game that can eliminate enemies through support ultimates.
The common combos players have gone for in the past are with Moonnight ultimates or Neores. Sometimes people even go for the Bucky alt into the Groot alt. And recently I’ve even noticed the most lethal combo in my opinion is Johnny’s ultimate with the cloak and dagger flashbang. No one’s really surviving that either. What is even crazier about this ultimate is that it only costs 2,800 points, making it one of the fastest charging ultimates in the entire game if you are cooking with damage on Groot. So, if you get it really fast in the first fight of the game, don’t feel afraid to just rip it if the enemies don’t have support ultimates.
Outside of the first fight though, I am hesitant to fully give this tip. Groot’s ultimate is the ultimate combo setup machine, so you really want to make sure that your team is ready to at least follow up on it. Ideally, you want to make sure that your team has a combo to oneot through a support ultimate, too.
The Best Strategy for Ultimate Combos
The best way to do this is to constantly look at the scoreboard between fights to assess your combo potential for the next engagement. It’s essential to observe your teammate, ensuring they are prepared to execute the combo effectively. Responsibility falls on you as the group player to coordinate the timing of your ultimate activation. If your timing is off, leading to unfavorable outcomes, the fault lies with you. Set yourself up for success by ensuring proper coordination.
If you find yourself without a combo opportunity and facing enemy support ultimates, consider alternative strategies. In situations where an enemy support like Luna Snow is isolated from their team, capitalize on the opportunity to isolate and eliminate targets efficiently. It’s crucial to force out support ultimates by applying pressure strategically. Additionally, anticipate enemy counters beyond support ultimates. Characters like Adam Warlock pose a significant threat to Groot due to their ability to nullify combo plays.
To maximize the effectiveness of Groot’s ultimate ability, consider countering defensive measures like Mag’s shield. Understanding Mag’s shield mechanics and timing can help you bypass its defenses effectively. By walling off non-essential targets and strategically placing thorn lash walls, you can enhance the impact of Groot’s ultimate ability. Remember, teamwork is paramount in securing victories with Groot’s ultimate. Coordination and follow-up from your team are crucial for successful engagements.
Now, transitioning to a discussion on countering strategies against Groot, several characters present challenges. Facing off against Emma as Groot can be particularly challenging due to her ability to capitalize on your wall placements. While challenging, skilled execution can overcome this matchup’s difficulty, showcasing the importance of skill mastery in high-level gameplay.

Counters and Synergies for Groot
Dive tanks like Captain America that can just ignore your walls on Groot are also very good into him. But it depends on whether or not the dive DPS are strong in the given meta. For damage characters though, there are quite a few counters. Wolverine is the bane of Groot’s existence and makes it literally impossible to play if you don’t have a game plan with the rest of your team. You have to constantly swing corners wide and playing chokes becomes a nightmare. Just ban Wolverine if you want to take the game over on Groots to be honest or just put an iron wall down before he really goes in for the dive because then he can block the pull into his team.
If he has a jetpack with Rocket though, um, GG, go next. Iron Man is also really annoying to play Groot into since he can just stay out of your range, break your walls super fast, and overall just give you a horrible time. The same kind of style is also true for the Punisher, but he isn’t nearly as annoying as Iron Man. Bucky is also annoying to play against since he can just hook you in. So, make sure you save a wall for when you hear his hook or get behind cover.
Divers like Psylock and Black Panther won’t eliminate you directly as Groot, but they will decimate your backline, making it very difficult to win the fight on the front line. If your supports suck, GG, you’re cooked. Finally, for strategists, Loki is really good into Groot, as he is one of the only supports that can break your walls somewhat quickly with little to no repercussions. Groot has always had tons of counters. The community just had to catch up and get educated as to what those counters are.
As for who Groot likes to play with, typically he is just slotted next to the meta tanks that are available, either Magneto or Emma, whichever isn’t banned. This is because they are just so solid and can do whatever you really need. They can either peel for your backline or bulldoze over the front line. It’s just super flexible and great. The DPS that like playing with a Groot are the ones that can combo with his ultimate and have fast burst damage to follow up on walls. These characters are your buck eats and moonsights and but also Neore and Human Torch. To be honest, almost every DPS goes really well with Groot, aside from maybe characters like Hawkeye and Hela that can just get blocked off.
Thank you for diving into our guide! Discover our exceptional Marvel Rivals boosting services and elevate your gaming experience with our top-tier boosts.