


- Agent Abilities in Valorant
- Understanding Agent Skye’s Ultimate Ability
- Explaining Weapon Damage in a Game
- Understanding Damage Mechanics in the Game
- Understanding Projectile Shots in Gaming
- Effective Techniques for Using the Hero
- Long-Range Strategy
- Understanding the Ultimate Ability
- The Ultimate Ability: Key Considerations
- Using Your Ultimate Ability Wisely
- Understanding Her Movement in Combat
- Improving Your Gameplay
- Maximizing Movement Efficiency in the Game
- Improving Your Aerial Mobility in the Game
- Mastering Updraft in Combat
- Mastering Updraft Scope in the Game
- Optimizing Line of Sight with Updraft
- Vertical Momentum Mechanics
- Improving Vertical Movement in Video Games
- Game Mechanics
- Analysis of Mnemonic Device “CART”
- Strategies for Vertical Advantage in Gaming
- Improving Positioning in First-Person Shooter Games
- Mastering Positioning and Range
- Effective Positioning Strategies in Overwatch
- Preferences in Shooting
- Positioning and Strategy
- Understanding Mid-Range Play in Basketball
- The Importance of Tempo in Valorant
- Mastering the Art of Vertical Positioning
- Mastering Vertical Movement in Gaming
- Navigation Tips for Using Dashes
Agent Abilities in Valorant
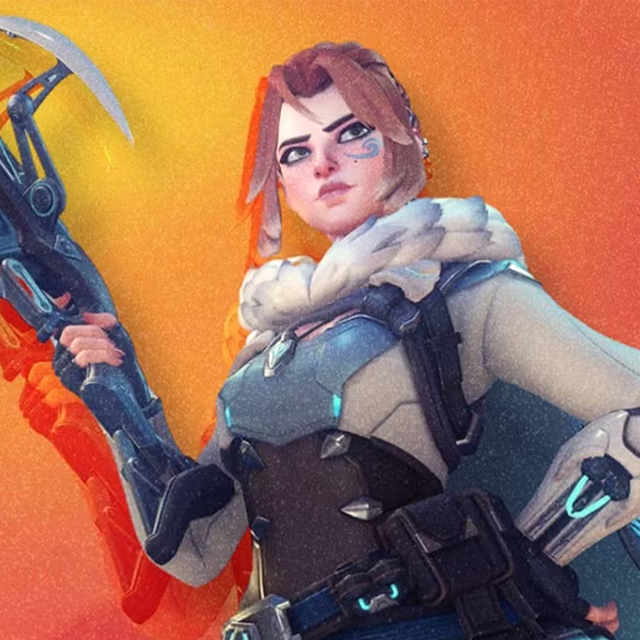
In Valorant, agents come equipped with unique movement and utility mechanics that define their role in combat. One such agent features a versatile dash ability that responds to your movement input — whether you’re strafing left, right, forward, or back, the dash will propel you in that direction. Additionally, this agent possesses an updraft skill, allowing them to gain vertical mobility by launching into the air. These abilities are essential for repositioning, dodging abilities, or initiating aggressive plays.
Scoped Aim Mechanic
A noteworthy mechanic to understand is how scoped aiming interacts with aerial movement. When activating take aim mid-air, your character will slow down significantly while maintaining vertical height — perfect for lining up precise shots without plummeting. However, if you’re already descending, the ability will still reduce your fall speed, giving you more control during aerial engagements.
Understanding Agent Skye’s Ultimate Ability
Skye’s ultimate ability, known as Bolo Shot, is a high-impact crowd control tool. When it lands on a target, it pulls in surrounding enemies and triggers a delayed explosion. This explosion causes hindrance to the primary target and applies a 75% movement speed reduction. Additionally, all nearby affected enemies within approximately 5 meters suffer a 25% movement penalty, making it a powerful initiation or zoning ability in team fights.
Analysis of Hero Breakpoints
Let’s break down a few key breakpoints for this hero. For example, a 250 HP hero like Soldier: 76 can be eliminated with two body shots from Take Aim.
Explaining Weapon Damage in a Game
Take Aim delivers 40 base impact damage upon hitting a target. In addition, it inflicts 90 explosion damage, totaling 130 per shot. Enemies within a 2.3-meter radius of the impact may also take up to 30 splash damage. Therefore, two body shots (130 x 2 = 260) are enough to eliminate a 250 HP hero.
Understanding Damage Mechanics in the Game
A clean headshot will instantly take down most 250 HP heroes. Alternatively, a combination of a headshot and a body shot, or a body shot followed by two rapid-fire hits, will achieve the same result.
Dealing with Squishy Targets
For low-health heroes like Tracer, a single headshot from Take Aim followed by any minor damage will secure the kill. Even a body shot followed by a single rapid-fire headshot is sufficient.
Understanding Projectile Shots in Gaming
Both Take Aim and rapid-fire are classified as projectiles. While they travel very fast, they are still subject to projectile mechanics. At close range, aim adjustment is minimal. However, at long range, accuracy relies more on anticipation than tracking. In duels against mid-range opponents like Ashe or another Freya, it’s often best to aim where the target is likely to move during their strafing, rather than where they currently are.
Effective Techniques for Using the Hero
This hero performs best when using a soft lead technique. Rather than pre-aiming and flicking, focus on tracking the target and subtly leading your crosshair just past them as they move. Precision through slight lead adjustments tends to yield better results in mid-range encounters.
Canceling Take Aim Animation
A useful trick is the ability to cancel the Take Aim animation. By pressing the right mouse button and holding the left mouse button immediately afterward, the shot will trigger as soon as possible. This minimizes movement interruption and prevents the full scope-in effect, keeping your field of view more stable and responsive. It’s especially effective for maintaining momentum during quick skirmishes.
Long-Range Strategy
At longer distances, projectile travel time becomes more noticeable. In these situations, aim slightly ahead of your target’s last position — prediction becomes more important than reaction. Firing where the target was can often result in a hit if they circle back during their movement pattern.
The Ultimate Ability
Let’s examine the hero’s ultimate — Folo Shot. Statistically, this ability is underwhelming in terms of raw power. It inflicts 25 initial damage, followed by 90 damage over time, and concludes with a 100-damage explosion. The total of 215 damage is enough to eliminate low-health targets like Tracer but falls short against most other heroes.
Understanding the Ultimate Ability
Because of its limited damage ceiling, Folo Shot should not be treated as a standalone elimination tool. It is best used to weaken targets and create opportunities for follow-up attacks. Effective use of this ability requires coordination or chaining it with other damage sources.
Optimizing Ultimate Usage
To maximize the effectiveness of this ultimate, precision is essential. Its value is heavily frontloaded — missing the initial impact significantly reduces its overall damage potential. While the 25% movement speed reduction can be helpful for follow-up attacks, the ultimate is only truly impactful when it directly hits a target.
The Ultimate Ability: Key Considerations
The ability comes with a casting time and a notable drawback — it slows your movement while airborne and gives away your position through a loud vocal cue. These factors make you an easy target. It’s important to approach its usage with patience: avoid rushing the setup or trying to force value in the middle of chaotic fights.
Casting Time and Strategy
Because of the casting delay and movement penalty, you must choose your moments wisely. Avoid jumping in recklessly. Set up from a safe angle, catch enemies off guard, and prioritize securing a hit rather than making an overly flashy play.
Using Your Ultimate Ability Wisely
You gain this ultimate fairly often, so don’t be overly conservative. It’s completely valid to use it on a single enemy to secure a kill or win a skirmish. Trying to save it for high-impact plays every time can lead to missed opportunities.
Positioning for Success
Optimal positioning for landing key shots with this hero often involves staying airborne. While being in the air can make you more exposed, it also increases your chances of hitting the ground near the target even if your aim is slightly off. This forgiving aspect allows for more aggressive positioning and dynamic engagements.
Tips for Crosshair Placement
One of the most effective habits is pre-aligning your crosshair before dashing. For example, if you plan to dash left around a corner, start moving your crosshair toward the anticipated enemy position on the right as you initiate the dash. This reduces the need for a large flick and improves your reaction time.
You can also use this approach to dash toward an opponent and adjust your aim in advance to align with their position. Instead of constantly tracking with high-speed movements, adopt a more controlled aim style. Wait for the target, adjust patiently, and take the shot. In high-pressure situations, animation canceling and rapid-fire mechanics become necessary, but whenever possible, prioritize stable aiming and soft tracking to maintain accuracy.
Understanding Her Movement in Combat
Her movement abilities are extremely effective for both positioning and repositioning, giving you excellent control over the battlefield. However, it’s important to note that she is not particularly fast when it comes to retreating. Once you’re engaged in a close fight, escaping isn’t a viable option. This makes proactive positioning essential. Fortunately, her kit provides multiple tools that make strategic movement both accessible and rewarding.
Strategic Positioning for Success
Because escape is limited, you should always think one step ahead. Use vertical mobility and directional dashes to take favorable high-ground or flanking positions before a fight starts. Be deliberate with every movement and avoid standing still or getting tunnel-visioned in one location.
Improving Your Gameplay
The best way to increase survivability and effectiveness is to stay mobile. Take a shot, reposition, and repeat. Think like a sniper — strike from unexpected angles, never linger in one place, and keep your enemies guessing. This hit-and-run style not only maximizes damage output but also reduces your exposure to threats.
Cooldown Management
One of the key strengths of this hero is that all of her cooldowns are relatively short. This allows you to be consistently active with your abilities, especially when repositioning or engaging opponents. Smart cooldown usage will significantly boost your mobility and combat potential.
Maximizing Movement Efficiency in the Game
Short cooldowns are just one more reason to constantly reposition during combat. Whether you’re escaping pressure or seeking a better angle, staying mobile is essential. An advanced tip is to use your movement abilities in combination with the environment — such as ledges, high ground, or tight corridors — to stall or change trajectory unpredictably. Mastering this aspect is crucial for taking full advantage of her versatile kit.
Exploring Advanced Movement Techniques
Now let’s dive into some of the advanced movement techniques that have been discovered through playtesting and observation. The first thing to note: if you activate your dash without pressing any directional input, you will dash directly upward. This mechanic opens up creative vertical repositioning opportunities and can be especially useful when escaping or ambushing from above.
Improving Your Aerial Mobility in the Game
You can enhance your vertical movement by combining your dash and take aim abilities. By dashing upward and immediately activating take aim, you’ll gain additional height. This trick can be performed up to three times consecutively without issue, allowing for surprising angles and elevated positioning.
Extending Your Air Time
To take it a step further, adding in your updraft ability will let you remain airborne indefinitely. The key is to start with an upward dash, then chain into updraft and follow with take aim again, cycling these abilities in sequence. This opens up a whole new dimension of mobility, especially when fighting in vertical-friendly environments.
Mastering Updraft in Combat
Upon executing your dash, immediately trigger your updraft. As soon as you’re in the air, activate take aim to maintain momentum and maximize air time. With good timing, you’ll be able to hover above the battlefield, applying pressure from unexpected angles.
Perfecting Dash Key Techniques
To execute this consistently, start by hitting your dash key, then quickly follow up with take aim. Ride that trajectory, then chain into updraft at the apex. Precision and rhythm are essential to make this smooth and effective. With practice, this combo becomes a powerful tool for both offense and escape.
Mastering Updraft Scope in the Game
Updraft opens up a variety of creative plays. While it may not always be practical in the heat of battle, it can be highly effective for surprise angles and burst damage opportunities when used deliberately.
Utilizing Updraft for Additional Shots
One key technique is timing your scope and shot during an updraft. Activate updraft, scope in, and take a shot. As you reach the peak and begin descending, you can often line up and fire a second shot before landing. This creates a burst potential that can catch enemies off guard.
Optimizing Line of Sight with Updraft
In many scenarios, updraft can be used simply to gain better line of sight. Whether peeking over obstacles or repositioning vertically, this ability is great for manipulating angles mid-fight.
Strategic Use of Half Walls
For example, when facing low cover or half walls, you can use updraft or dash to get above and take a clear shot. This tactic is especially useful on maps with vertical geometry or tight choke points. Look for environmental features that you can exploit to create momentary high ground advantages.
Vertical Momentum Mechanics
It’s important to understand how your dash interacts with your vertical movement. Specifically, using dash immediately after updraft will cancel your vertical momentum, significantly reducing your height.
If you activate updraft and instantly dash forward, you’ll barely leave the ground. This is something to avoid when trying to gain height, but it can also be used tactically to stay low while still utilizing your mobility for quick repositioning.
Strategic Dash Usage
Your dash ability cancels out any forward vertical momentum gained from updraft. This is a crucial mechanic to master for precise aerial control.
Improving Vertical Movement in Video Games
For example, if you dash upward and then dash sideways, your vertical movement will immediately stop. Without that sideways dash, you would continue rising, potentially going well above a balcony or ledge. Using your dash to halt vertical momentum allows for better control and positioning.
Mastering Dash Techniques for Better Gameplay
By strategically dashing to the side after an updraft, you can control your height and avoid overshooting your desired position. This technique is useful when you need to stay within line of sight or maintain a specific vantage point.
Game Mechanics
If you find yourself in a spot where you don’t want to move forward or upward anymore, use your dash to stop your ascent instantly. This simple mechanic can greatly improve your movement precision during combat.
Game Sense
One of the most important aspects of game sense in this game is positioning. Positioning changes rapidly and depends heavily on what you have, what the enemy has, and how you can use your abilities to gain an advantage.
Analysis of Mnemonic Device “CART”
To help with positioning, I like to use a mnemonic device I learned from Coach Spyo: CART. This stands for Cover, Range, Angle, and Tempo.
Understanding the “CART” Method
The “CART” method breaks down into four key elements. Cover refers to using vertical cover to protect yourself. Range is about maintaining optimal distance. Angle involves positioning for the best line of sight or surprise. Tempo focuses on controlling the pace of engagements.
Strategies for Vertical Advantage in Gaming
Freya benefits greatly from vertical cover. For example, buildings and rooftops provide strong defensive positions where you can leverage your vertical abilities. Playing around corners or elevated spots gives you a better chance to land the first hit while making it difficult for enemies to hit you. As Coach Spyo pointed out, if you can hold a corner on the ground, you can often hold the same corner in the air effectively.
Effective Defensive Positioning
Leveraging your vertical abilities against enemies is a key strength. For example, when defending a point, use buildings or elevated areas where it’s hard for enemies to hit you while you have a clear line to land the first shot. Generally, playing on rooftops or corners works well. As Coach Spyo emphasized in his Far coaching sessions, if you can hold a corner on the ground, you can often hold the same corner from above.
Improving Positioning in First-Person Shooter Games
Rather than playing predictable ground corners, seek vertical angles above enemies. Use environmental cover like bridges or ledges to protect yourself while gaining the height advantage.
Understanding the Importance of Angle
Angle and cover are closely related. The angles you want to find are often sneaky ones that give you an unexpected line of sight.
Mastering Positioning and Range
Instead of staying where enemies expect you, position yourself above them to take vertical angles. This also lets you find soft off-angles—unique spots that most heroes cannot reach. These angles are where your vertical mobility grants you significant tactical value.
The Importance of Angles
Next up is range. We touched on this earlier in the mechanics section, but the key is to focus on mid-range engagements.
Effective Positioning Strategies in Overwatch
You don’t want flankers getting too close since you lack the mobility to escape easily—unless you can use vertical cover to your advantage. For example, if I’m pushed from this angle, I can quickly climb up here to break line of sight from a Tracer or similar flanker. However, I generally avoid staying in this position because it’s too close for comfort. Even if I take a hit, if I miss a shot or can’t pressure the target I’m marking, I need to reposition to a safer angle that supports mid-range attacks.
Adapting to Enemy Flankers
Preventing flankers from closing the gap is essential since your mobility doesn’t allow for quick escapes on flat ground. Using vertical cover is a great counter, but once a fight gets too close, moving to a better position is critical.
Preferences in Shooting
Personally, I prefer shooting from this kind of position. I like engaging targets around this range. What I avoid is shooting at enemies that are too far away. For example, I can still target the balcony from here, but that’s about the maximum effective distance I want to engage at. This map doesn’t really offer a lot of long-range opportunities anyway.
Challenges with Long-Range Shooting
If I’m here, I can still aim at this balcony, but this is about as far as I want to engage. This map simply doesn’t offer many long-range opportunities in this area.
Positioning and Strategy
Moving to the second point, the angles and sightlines open up significantly. Here, enemies often come through the front door, and I can comfortably play at this range. For example, an Ashe would want to hold a similar position up here.
Effective Range and Tactics
At the second point, these open angles make it ideal for mid to long-range heroes to operate. I can engage enemies without much
Understanding Mid-Range Play in Basketball
I could play some vertical over here, do whatever I want, but the key is to maintain your optimal range. You really are a mid-range hero. When you hear “mid-range,” think of the Goldilocks zone — not too close, not too far, just right for the situation.
The Importance of Range in Basketball Strategy
Range is fundamental because it defines your effectiveness zone and dictates your positioning and shot selection.
The Importance of Tempo in Valorant
Tempo refers to managing your abilities, ammo, and even health — essentially all the resources that affect your combat readiness. So what does it mean to use tempo well in the game? For example, your updraft has a 10-second cooldown. That’s not the longest cooldown, but it’s significant enough to require thoughtful timing.
On a map like this bridge, I can use my dash technique to get up quickly, but it still takes some time, so managing when to use updraft is key.
Effective Use of Cooldowns
Understanding cooldowns is crucial in Valorant. Your updraft ability’s 10-second cooldown means you can’t spam it, so strategic planning is necessary. Using your dash tech to move efficiently around the environment can help conserve cooldowns for critical moments.
Mastering the Art of Vertical Positioning
Taking strong vertical positions requires good timing. When your updraft is ready, use it to quickly secure an advantageous height. For example, with updraft available, I will take this position swiftly to gain an edge over opponents.
Efficiency in Vertical Positioning
Taking a strong vertical position quickly is crucial. Using your updraft allows you to do this much faster than relying solely on dashes. So, when your updraft is ready, use it to secure that high ground swiftly.
Mastering Vertical Movement in Gaming
While you can reach high ground using just your dashes, it tends to be slower. Combining your dashes with updraft not only increases your vertical mobility but also lets you control your position in the air, allowing you to stay mobile and unpredictable.
Optimizing Movement Techniques
Your updraft pushes you slightly forward as well, so it’s important to combine it effectively with your dashes to maximize movement efficiency and positioning advantage.
Navigation Tips for Using Dashes
For example, if you’re trying to get onto a bridge or a ledge that’s out of direct reach, you’ll need to use your dash to close the gap. Managing your cooldowns is essential here — make sure you have a dash available when you need to combine it with your updraft.
Importance of Cooldown Management
Remember, you have two dashes, so plan accordingly to ensure you can reach your intended position without running out of mobility options.
Thank you for diving into our guide! Discover our exceptional Overwatch 2 boosting services and elevate your gaming experience with our top-tier boosts.
Mastering Freja – The Ultimate Playmaker Guide