


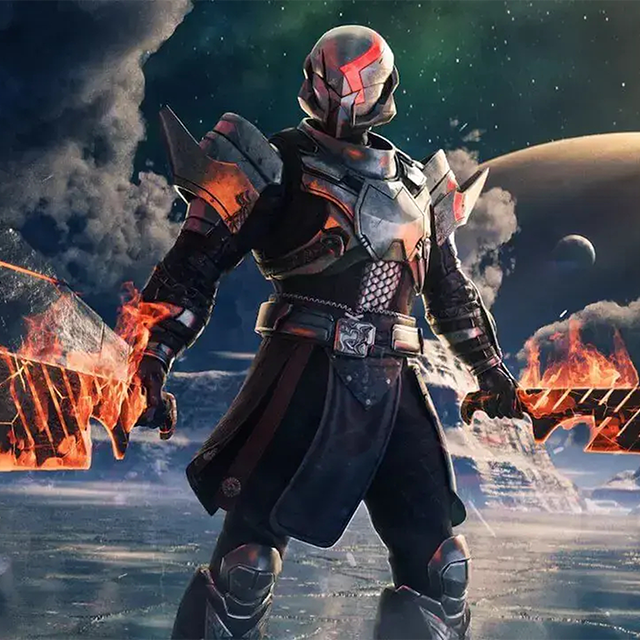
- Guide to Obtaining the Exotic Auto Rifle Kavastov
- Locating the Cysts and Regional Chests
- Unlocking Modes of Light in Destiny 2
- Unlocking Micah 10 Quests and Finding Encryption Bits
- Locating Encryption Bits in the Game
- Defeating the Boss and Finding the Purple Crystal
- Locating the Encryption Bit
- Locating Encryption Bits
- Exploring the Game: Finding Chests and Battling Enemies
- Locating the Legendary Kavastoff
- Obtaining Kavasto in the Game
- Resetting Bosses in Pale Heart Triumphs
- Encountering Bosses in Blooming and Impass
- Locating the Fourth and Fifth Modes
- Discovering the Sixth Mode
- The Traveler’s Experience
- Locating Kavastoff: A Guide to Finding the Exotic Version
Welcome, Guardian! Librarian Husky here — your trusted source of wisdom from the deepest archives of the Tower! If you’re hunting down the legendary Kavastov and want to unlock its exotic might, you’ve come to the right scroll… erm, guide. Grab your Ghost, prep your loadout, and let’s journey through the Pale Heart together.
Guide to Obtaining the Exotic Auto Rifle Kavastov
Kavastov is an art-clear machine with ricocheted rounds straight out of a cowboy movie. If you’re a big fan of auto rifles, then you will definitely want to get this exotic weapon. Here is a guide on how to get the exotic auto rifle Kavastoff.
Obtaining the Legendary Kavasto
First, we’ll need to obtain the legendary Kavasto so later we can unlock the exotic version. Unlocking the legendary Kavasto requires you to collect 15 lost encryption bits.
Locating the Cysts and Regional Chests
You can find six of them in the cyst missions that you complete as part of the “Alone in the Dark” quest line. The other nine are found inside the regional chests hidden around the Pale Heart. If you don’t know which ones you’re still missing, you can check out the one monstrous triumph located in the secret of the Pale Heart section.
Unlocking the Exotic Kavasto
When it comes to unlocking the exotic Kavasto, we will need 17 modes of light. You get nine modes of light for defeating the nine overthrow bosses. There’s three in each area.
| Image | Name | Description | Price | Details |
|---|---|---|---|---|
 | Trials of Osiris Flawless | Hot Offer
Flawless Trials of Osiris run, 7-0
Lighthouse access
Adept Weapon of this week
| Original price was: $5.00.$2.50Current price is: $2.50. | Show details |
 | Salvation's Edge Raid | Hot Offer
Raid completed
Unique Emblem
Euphony Exotic Linear Fusion Rifle
| Original price was: $5.00.$2.50Current price is: $2.50. | Show details |
Unlocking Modes of Light in Destiny 2
The other eight modes of light come from collecting these visions of the Traveler scattered around the Pale Heart. Once again, if you don’t know which bosses you’ve already killed, then you can check out the three triumphs located in the exploration section of the Pale Heart. Also, one last tip: If it’s your first time completing the “Alone in the Dark” quest line, then make sure you fully finish each Overthrow. That way, you can also kill the final boss for the modes of light.
Prerequisites for Unlocking Kavastov
All right, now that you have a general idea on how to unlock Kavastov, let’s get to the prerequisites. First of all, you need to own the final ship expansion and complete its campaign all the way to at least step 29.
Unlocking Micah 10 Quests and Finding Encryption Bits
This is when you will unlock the Micah 10 quests and will be able to grab the lost encryption bits from the cyst missions. The first encryption bit is located within the sword dance cyst in the refraction area. You first complete the cyst while on the convalescent greenery mission. If you’ve already completed that but forgot to grab the encryption bit, then you can always redo the cyst mission by simply walking up to this bird located at the entrance and choosing which cyst you want to activate in each area. Once active, you can add a waypoint to the cyst.
Completing the Sword Dance Cyst
To complete the sword dance cyst and find the encryption bit, ensure you are on the convalescent greenery mission. Visit the refraction area and locate the cyst. If you missed the encryption bit previously, redo the cyst mission by interacting with the bird at the entrance. Choose the desired cyst to activate in each zone and set a waypoint for easy navigation.
Locating Encryption Bits in the Game
Walk to the entrance and progress until you get to this area with the sword. Once you get here, follow me to the first encryption bit.
Discovering the Second Encryption Bit
The second encryption bit can be found in the searing light cyst. To get to the entrance, you load into the blooming right straight until you get to this portal, which you can go through and then walk to the left into the waterfall. After you defeat the burning boss, you will find the encryption bit located inside the cave with the purple light, which is to the left of the big pillar of light.
Uncovering the Third Encryption Bit
The third encryption bit can be found inside the aerial ace cyst located in the transgression area.
Defeating the Boss and Finding the Purple Crystal
Once you get here, shoot down on the bllights and defeat the boss. You can start looking for this purple crystal on top of the lava. You will want to jump on it and follow me to the next encryption bit.
Finding the Fourth Encryption Bit
The fourth encryption bit is located within the moth-infested cavern cyst. You can find it pretty close to the entrance. After dealing with all the enemies and mini bosses on this plate, go ahead and jump down.
Locating the Encryption Bit
And here you’re looking for a cave opening. Once you find it, go inside and collect the encryption bit. You can find the fifth encryption bit within the slayer cyst located in the seclusion area.
Reaching the Slayer Cyst
Once you defeat the boss, you will see this massive pillar of light in the middle. Now you simply have to turn around and go to the tunnel opposite of this pillar.
Locating Encryption Bits
There you will find the next encryption bit. The sixth and final encryption bit can be found within the smothering darkness cyst located in the transgression area. After defeating the final boss, look for this purple crystal hanging on top of the cave entrance. That’s where you’ll want to go in order to find the next encryption bit.
Acquiring Regional Chests
Now that we have found the first six bits, we can move on and get the rest which are located inside the regional chests around the Pale Heart. Let’s start with the landing.
Exploring the Game: Finding Chests and Battling Enemies
Load in and follow me to the three chests. Next up, we have the blooming. Load in and follow me. I’m picking up a spike. Enemy activator.
Locating Chests
When you enter the game, join me as we head towards the three chests waiting to be discovered. Moving forward, let’s focus on the blooming aspect of the game. Stick with me as I grab a spike and prepare for enemy encounters.
Locating the Legendary Kavastoff
Your location. Finally, the last three chests are in the impass. After obtaining the last encryption bit, you will notice that they combine into the lost encryption code. This will allow you to open up the chest containing the legendary Kavastoff. Once again, load into the impass.
Revealing the Encryption Code
Your location. Finally, the last three chests are in the impass. After obtaining the last encryption bit, you will notice that they combine into the lost encryption code. This will allow you to open up the chest containing the legendary Kavastoff. Once again, load into the impass.
Obtaining Kavasto in the Game
After obtaining the legendary Kavasto, now we are able to unlock its exotic version. Remember that you get one mode of light the first time you defeat an overthrow boss. The game heavily prioritizes bosses that you haven’t fought yet. But if for some reason you don’t get the boss that you need, you can simply fast travel the same area once the final round of the overthrow starts.
Locating the Golden Chest for Kavasto
Run inside and straight ahead the whole time until you walk across a golden chest. Open it to receive Kavasto.
Resetting Bosses in Pale Heart Triumphs
This will reset the current boss and give you a new one. To check which bosses you’re still missing, go into your Pale Heart Triumphs and you will be able to see it there. If for some reason you’re stuck at 16 out of 17 modes of light, then try depositing them into your vault and then defeat an overthrow boss. This should fix it. In the landing, you will fight Okar, Maruk, and Nolak.
Checking Boss Completion Status
This will reset the current boss and give you a new one. To check which bosses you’re still missing, go into your Pale Heart Triumphs and you will be able to see it there. If for some reason you’re stuck at 16 out of 17 modes of light, then try depositing them into your vault and then defeat an overthrow boss. This should fix it. In the landing, you will fight Okar, Maruk, and Nolak.
Encountering Bosses in Blooming and Impass
In the Blooming, you will face Boxalos, Colon, and Kofix. Lastly, in the Impass, you will have to defeat Runa, Rasca, and Rexen. After defeating nine bosses and obtaining the modes of light, you will be able to find the last eight modes scattered around the Pale Heart.
Exploring Mode Locations
For the first mode, we are loading into the lost city. The second and third modes are located in the landing. Echoes of the Traveler’s experiences vibrate within this object.
| Image | Name | Description | Price | Details |
|---|---|---|---|---|
 | Grandmaster Nightfall | Adept weapons here
Select number of runs
| Original price was: $5.00.$2.50Current price is: $2.50. | Show details |
 | Crota's End Raid | Hot Offer
Top Destiny 2 Boosting
Expert Crota’s End Raid Help
Fast & Reliable Service
| Original price was: $5.00.$2.50Current price is: $2.50. | Show details |
 | The Final Shape Campaign | Hot Offer
Up to 1965 Power Level
Exotic Class Item
Prismatic Subclass
| Original price was: $5.00.$2.50Current price is: $2.50. | Show details |
Locating the Fourth and Fifth Modes
I can feel the fourth moment. The fourth mode can be found on top of a tree in the blooming. The Traveler’s life. The fifth mode is located inside the searing light cyst in a small cave as soon as you break the seal and enter the cyst. Remember to speak to the bird if you need to swap cysts of this place.
Guidance on Finding the Modes
The fourth moment is a critical discovery in the traveler’s journey. It can be experienced atop a majestic tree during a period of flourishing. Meanwhile, the fifth mode lies hidden within a searing light cyst situated inside a small cave. To access it, you must bravely break the seal and venture into the cyst. Should you require assistance in exchanging cysts within this location, remember to consult the bird for guidance.
Discovering the Sixth Mode
The soul of the witness. The sixth mode is located in the divide section of the map which you can get to by walking from the Impass or Blooming. You’ll be able to find it at the highest point of the mountain behind a satellite.
Unveiling Memories
Memories. For the seventh mode, you will once again load into the Impass and you will find the mode on the left side of the map on top of a construct.
The Traveler’s Experience
The Traveler’s experience revolves around finding different modes of light scattered throughout the transgression area of the map. These modes of light, including a crystal projecting a red light, culminate in the discovery of the mode of primordial light. Once all 17 modes of light are collected, players can advance to the lost city. In this city, players are required to place the visions of the Traveler that have been collected in specific locations.
Thank you for diving into our guide! Discover our exceptional Destiny 2 boosting services and elevate your gaming experience with our top-tier boosts.
Solo Khvostov 2025: Effortless Unlock Guide in Destiny 2